Docker Project for DevOps Engineers

In this Blog, we'll build a simple Todo app using Flask and Docker. The app will allow users to add, update, and delete tasks. We'll use Docker to containerize the app and simplify deployment.
here's a summary of the web project for practising Docker and deployment concepts:
Create a simple web application
Write Dockerfiles for building Docker images
Build Docker images using the Dockerfiles
Persist data in containers using volumes
Run Docker images as containers and manage them
Deploy the application to Heroku

step 1:
Create a ubuntu cloud instance or open up your terminal to proceed.
step2:
Clone the repository from GitHub to your ubuntu server using command:
git clone https://github.com/KUNAL-MAURYA1470/Todo-App.git
cd Todo-App
step3:Create a Dockerfile
create a Dockerfile using following command:
nano Dockerfile
add following content in Dockerile:
# build the image based on python:3.8-slim-buster image
FROM python:3.8-slim-buster

# the work directory inside the container
WORKDIR /

# set enviournment variables
ENV FLASK_APP app.py
ENV FLASK_ENV development

# copy the requirements file inside the container
COPY ./requirements.txt /requirements.txt

# install the requirements using pip3
RUN pip3 install -r requirements.txt

RUN mkdir app
WORKDIR /app

# copy the project artefects into the container under the root directory
COPY . .

# the command to run once we run the container
CMD python3 app.py
This is a Dockerfile that is used to build a Docker image for a Flask application. Here's what each line does:
FROM python:3.8-slim-buster: This line specifies the base image to use for the Docker image. In this case, it uses the Python 3.8 slim version on the Debian Buster distribution.WORKDIR /: This sets the working directory inside the container to the root directory.ENV FLASK_APPapp.py: This sets an environment variable that specifies the name of the Flask application's main file.ENV FLASK_ENV development: This sets another environment variable that specifies the Flask application's environment.COPY ./requirements.txt /requirements.txt: This copies the requirements file from the local directory to the container's root directory.RUN pip3 install -r requirements.txt: This installs the required packages specified in the requirements file using pip3.RUN mkdir app: This creates a directory calledappin the container.WORKDIR /app: This sets the working directory to theappdirectory.COPY . .: This copies all the files from the local directory to the container'sappdirectory.CMD python3app.py: This specifies the command to run when the container is started. In this case, it starts the Flask application by running theapp.pyfile.
step 4:Build Docker images using the Dockerfiles
To build an image using Dockerfile run following command:
docker build -t kunalmaurya/todo-app:latest .
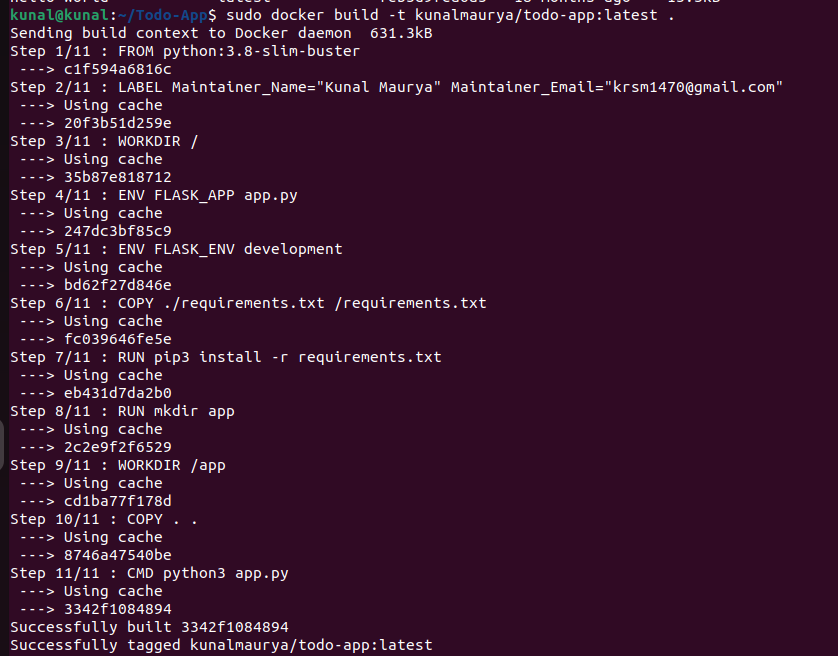
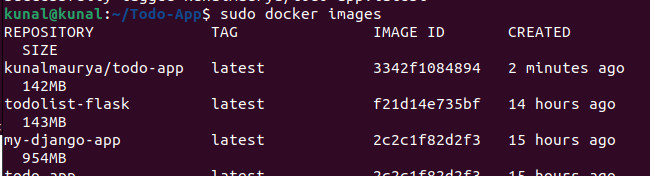
To see docker images use the below command so we can see the list of images:
step5:Persistent data storage in containers using volumes
docker volume create todolist.db

In Docker, a volume is a persistent data storage mechanism that can be used to store data independently of the container file system. When a container is created, a volume can be mounted into it, providing a mechanism for sharing data between containers, as well as persisting data across container instances.
By running this command, Docker creates a new volume named "todolist.db" that can be used to store data. This volume can then be mounted into one or more containers to provide persistent storage for that container's data. In this case, the volume is likely intended to store the data for a Todo List application, with the ".db" extension indicating that the data will be stored in a database format.
step6: Run Docker images as containers
docker run -d -p 5001:5000 -v todolist.db:/app/db kunalmaurya/todo-app

The command "docker run -d -p 5001:5000 -v todolist.db:/app/db kunalmaurya/todo-app" creates and runs a Docker container based on the image "kunalmaurya/todo-app", with the following options:
"-d": Runs the container in detached mode, which means that the container runs in the background.
"-p 5001:5000": Maps port 5000 inside the container to port 5001 on the host. This means that traffic sent to port 5001 on the host will be forwarded to port 5000 inside the container.
"-v todolist.db:/app/db": Mounts the volume named "todolist.db" into the container at the "/app/db" directory. This option provides persistent storage for the container data, meaning that data can be retained even if the container is stopped or removed.
"kunalmaurya/todo-app": Specifies the name of the Docker image to use for the container. Here you can specify your image.
step 7: Verify that the application is working as expected by accessing it in a web browser.
If you are using local server then run:
http://localhost:5001
or if you using cloud instance then run:
http://ec2-instance-public-ip:5001

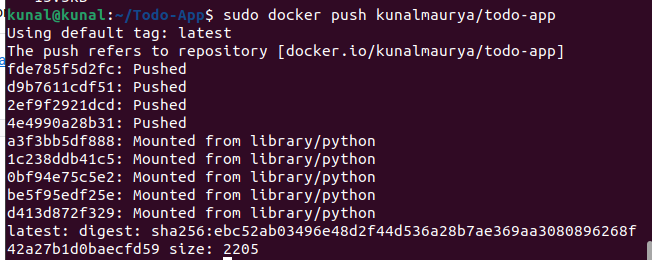
step8:Push the image to a public or private repository (e.g. Docker Hub)
The docker push command is used to push a Docker image to a container registry, such as Docker Hub, Google Container Registry, or Amazon Elastic Container Registry.
The command takes the form docker push [OPTIONS] NAME[:TAG], where NAME is the name of the Docker image to push and TAG is an optional tag to apply to the image.
To push first login to docker:
docker login

then use push command:
docker push imagename

Thank you for reading! Hope you find this article helpful.
~Kunal

