DevSecOps Ci-Cd Pipeline
Deploy the reactjs app in kubernetes with devsecops cicd pipeline

DevSecOps practices, integrating security into the development and deployment pipeline, have become essential for modern software development.
In this blog post, we will explore the process of deploying a React.js application using DevSecOps principles through Continuous Integration and Continuous Deployment (CI/CD) on Kubernetes.
The pipeline performs various tasks, including cleaning the workspace, checking out code from a Git repository, analyzing code quality with SonarQube, scanning for dependencies and vulnerabilities with OWASP Dependency-Check and Trivy, building a Docker image, pushing the image to a Docker registry, and deploying the application to both a standalone Docker container and a Kubernetes cluster.
Step By Step implementation
Step 1:Launch a EC2 instance
EC2 Instance Specification:
Operating System: Ubuntu
Instance Type: t2.large
Storage Configuration: 15 GB
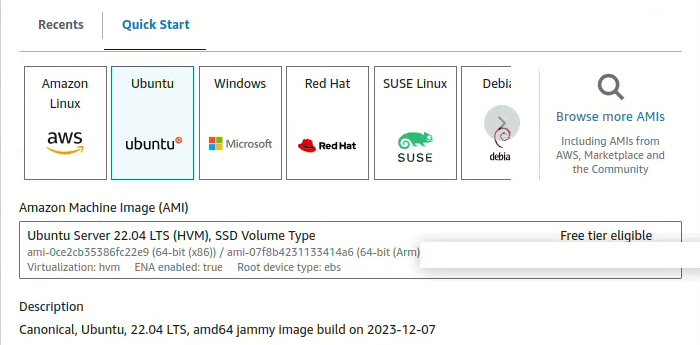

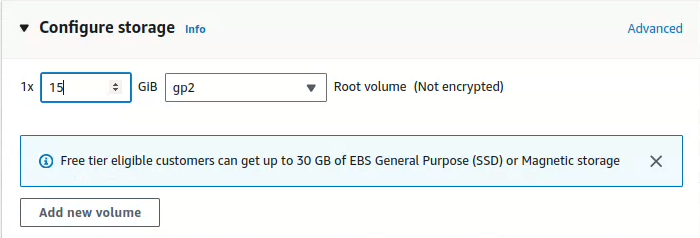
- Keep other settings as default as it is and click on "launch instance".

Connect Ec2
- Select the instance and click on connect option.


Step2: Install Jenkins
- In terminal type "sudo su" command to enter as root user and run following commands one by one:
#!/bin/bash
sudo apt update -y
sudo apt install openjdk-17-jre -y
curl -fsSL https://pkg.jenkins.io/debian-stable/jenkins.io-2023.key | sudo tee \
/usr/share/keyrings/jenkins-keyring.asc > /dev/null
echo deb [signed-by=/usr/share/keyrings/jenkins-keyring.asc] \
https://pkg.jenkins.io/debian-stable binary/ | sudo tee \
/etc/apt/sources.list.d/jenkins.list > /dev/null
sudo apt-get install jenkins -y
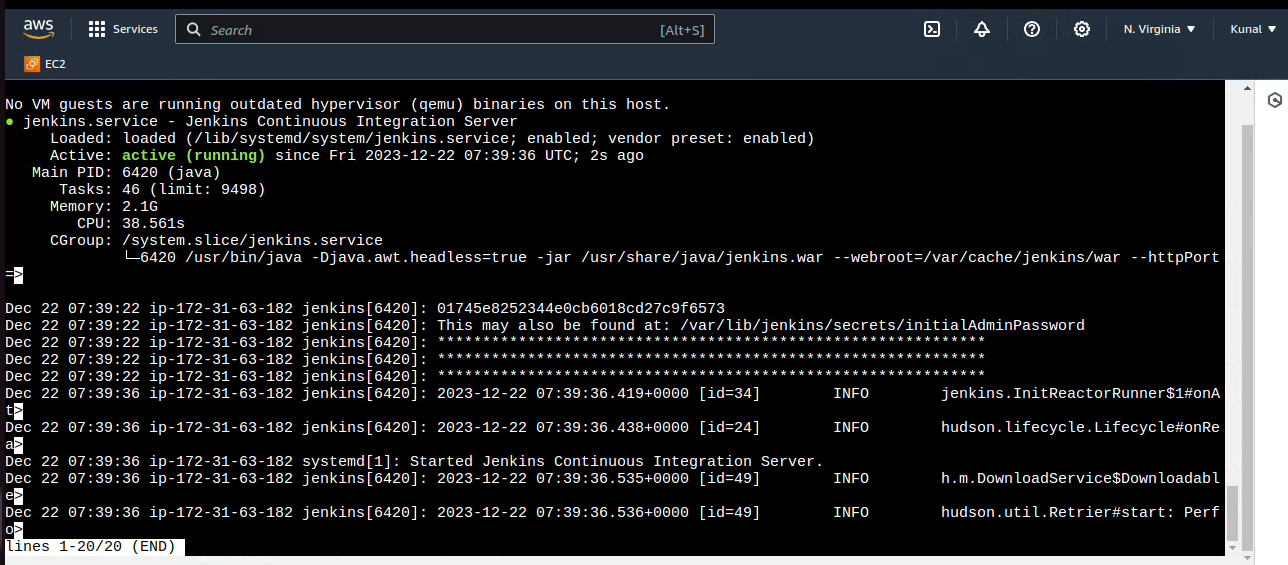
sudo systemctl start jenkins
sudo systemctl status jenkins
- Check the status of jenkins is "active(running)".
- Go to AWS EC2 Security Group and open necessary Inbound Port 8080.


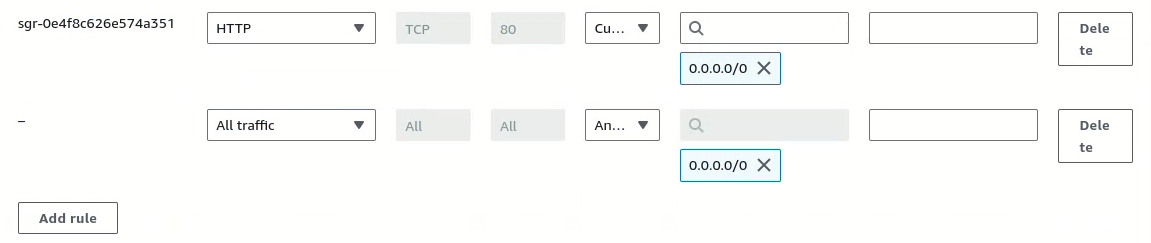
- For project purpose we allow all traffic to inbound access.
Access jenkins server:
- we can access it at http://<EC2 Public IP Address:8080> on browser.

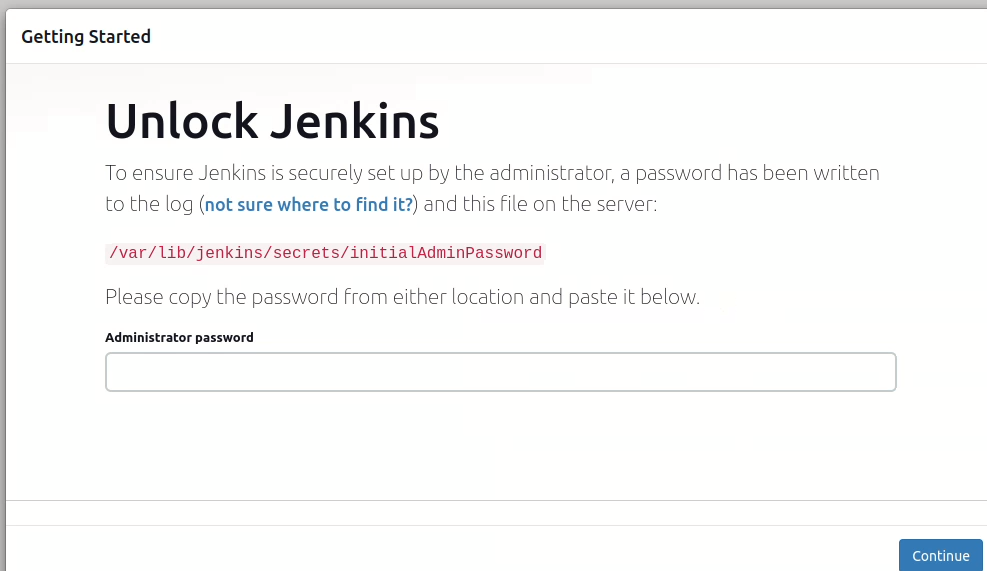
Get the administrator password by run this command on our ec2 instance:
sudo cat /var/lib/jenkins/secrets/initialAdminPassword

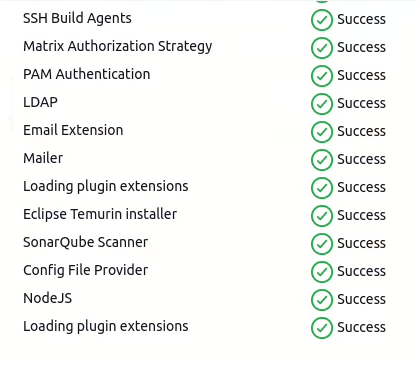
- After entering the password , click continue. Now, "click on install suggested plugins".


- Create a user click on save and continue.

now click on "save and finish" and jenkins is ready to use.

Step3:Install Docker and setup Sonarqube
- To install Docker , Run the following command one by one in our ec2 terminal:
sudo apt-get update
sudo apt-get install docker.io -y
sudo usermod -aG docker $USER   #my case is ubuntu
newgrp docker
sudo chmod 777 /var/run/docker.sock
- After the docker installation, we created a Sonarqube container (Remember to add 9000 ports in the security group).
docker run -d --name sonar -p 9000:9000 sonarqube:lts-community

- Now our Sonarqube is up and running. we can access it at http://<EC2 Public IP Address:9000> on browser.
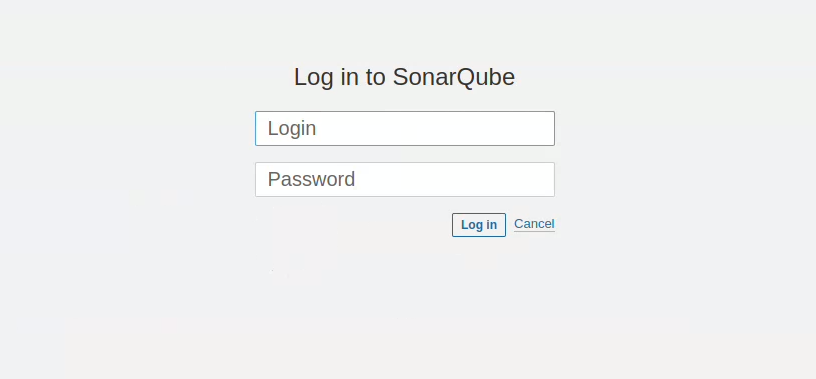
- Enter Login id: "admin" and password: "admin".
Now update the password.

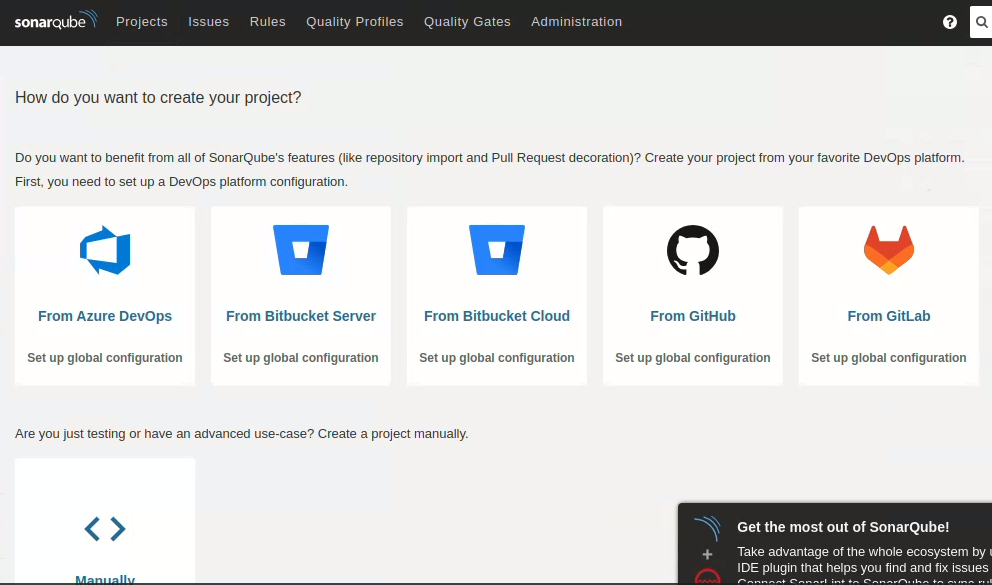
- Now you can use sonarqube dashboard.
Step4:Install Trivy [ IAC ]
- To install trivy run following command one by one in ec2 terminal.
sudo apt-get install wget apt-transport-https gnupg lsb-release -y
wget -qO - https://aquasecurity.github.io/trivy-repo/deb/public.key | gpg --dearmor | sudo tee /usr/share/keyrings/trivy.gpg > /dev/null
echo "deb [signed-by=/usr/share/keyrings/trivy.gpg] https://aquasecurity.github.io/trivy-repo/deb $(lsb_release -sc) main" | sudo tee -a /etc/apt/sources.list.d/trivy.list
sudo apt-get update
sudo apt-get install trivy -y
Step5: Install Plugins like JDK, Sonarqube Scanner, NodeJS, OWASP Dependency Check
- To install plugins, go to Jenkins dashboard and select "manage Jenkins".
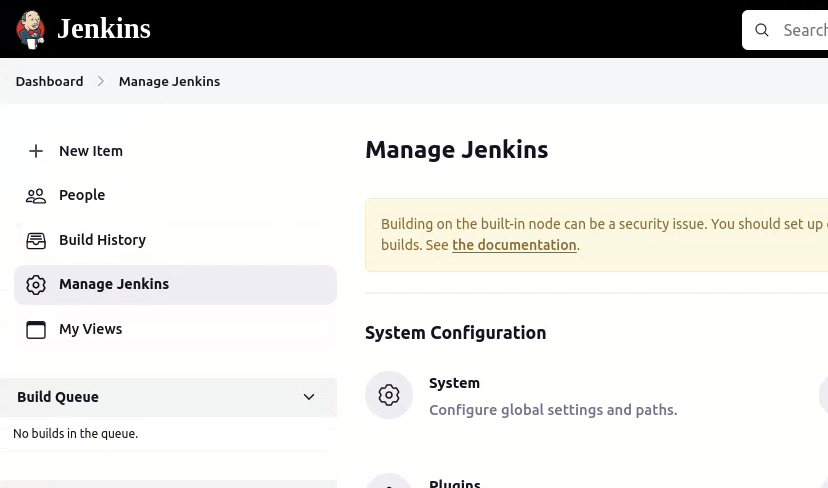
- Now, Select Plugins option.
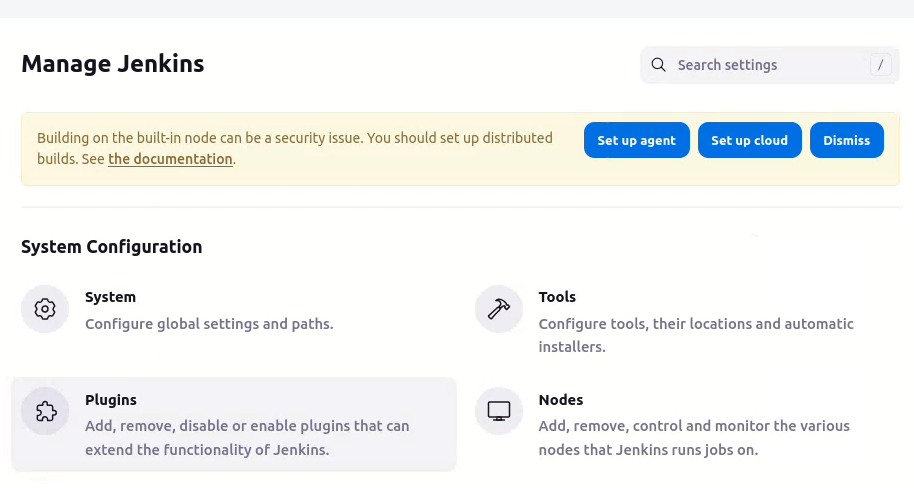
- Go to Manage Jenkins →Plugins → Available Plugins → Install below plugins
Eclipse Temurin Installer (Install without restart)
Sonarqube Scanner (Install without restart)
NodeJS Plugin (Install Without restart)

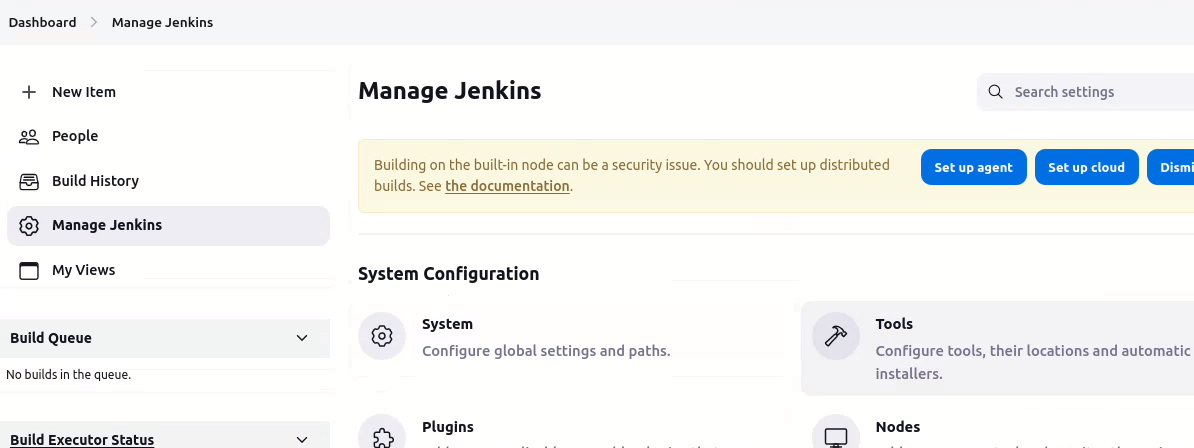
Configure Java and Nodejs in Global Tool Configuration
- Goto Manage Jenkins → Tools → Install JDK(17) and NodeJs(16)→ Click on Apply and Save
Go to JDK installations and do exact this:
Name:- jdk17
check install automatically
add installer: install from adoptium.net
version: jdk-17.0.8.1+1

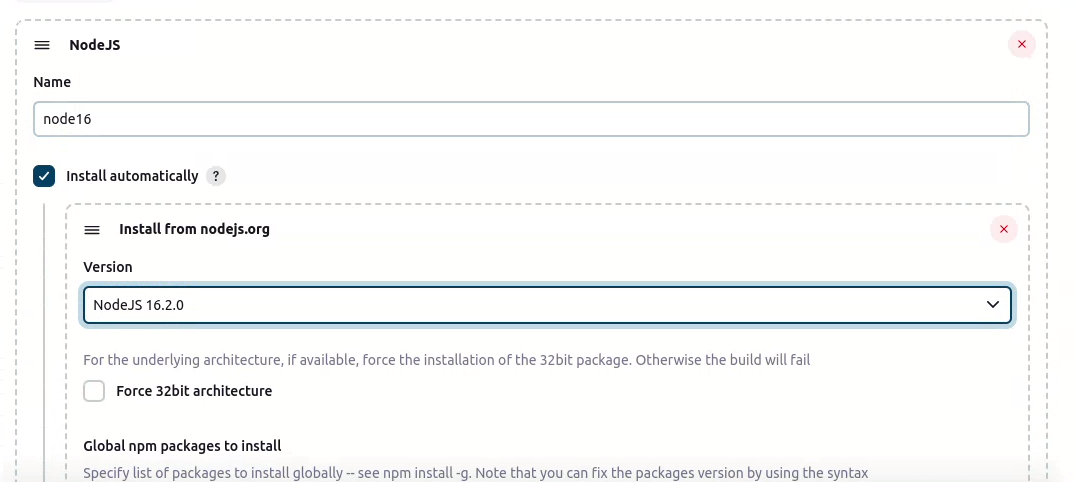
Go to NodeJs Installations :
Name:- node16
check install automatically
version: NodeJS 16.2.0
Step6: Install OWASP Dependency Check Plugins.
- Go to Dashboard → Manage Jenkins → Plugins → OWASP Dependency-Check. Click on it and install it without restart.
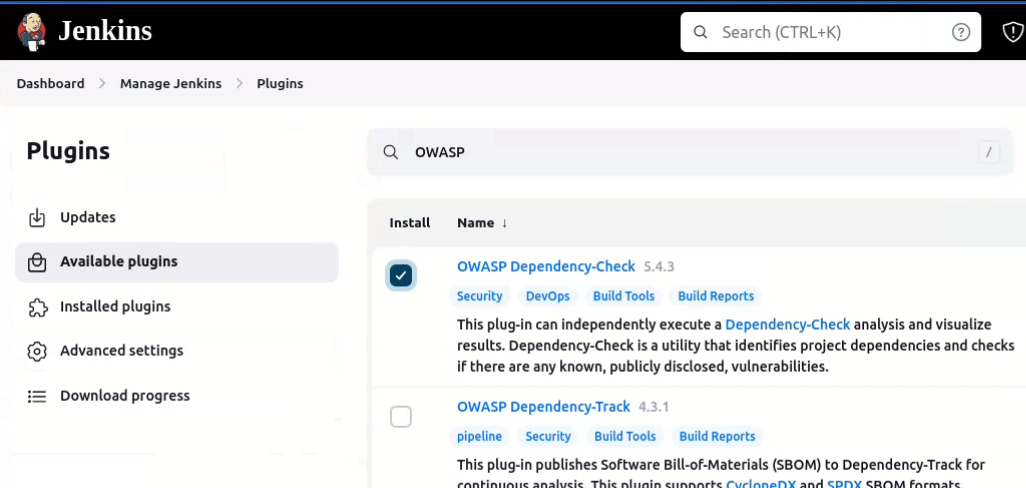
First, we configured the Plugin and next, we had to configure the Tool
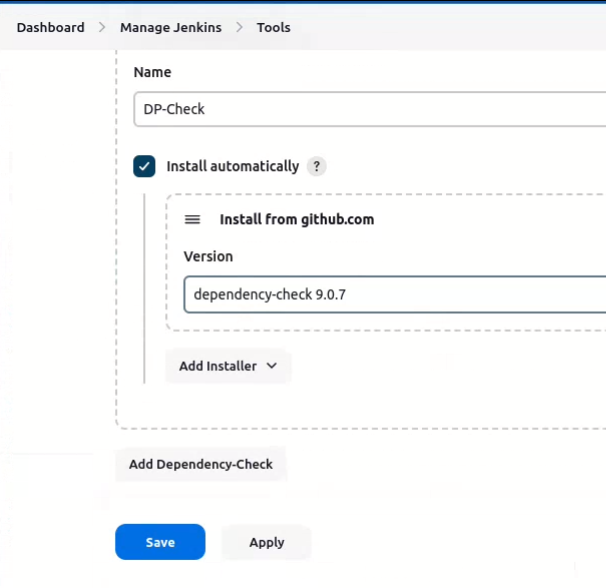
Go to Dashboard → Manage Jenkins → Tools → Dependency check installations
Name: DP-Check
check install automatically
choose install from github.com
version: dependency-check 9.0.7
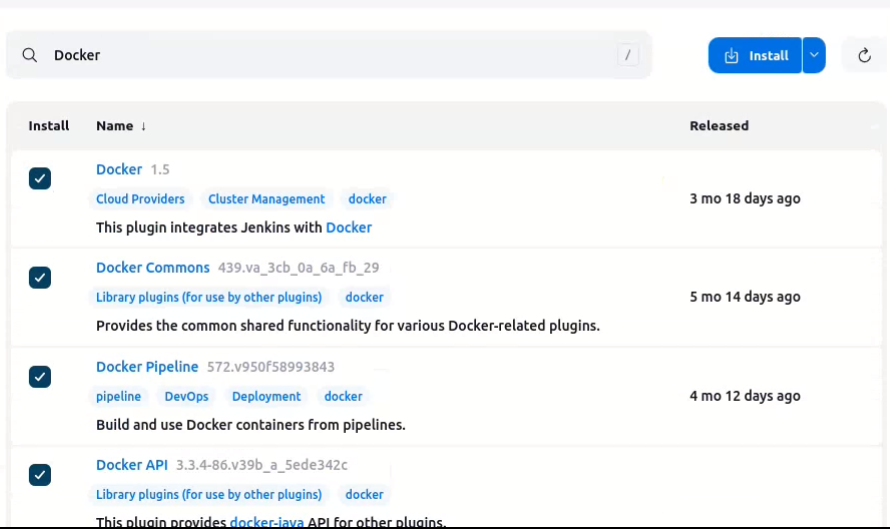
Step7: Install Docker Plugins
Goto Dashboard → Manage Plugins → Available plugins → Search for Docker and install these plugins
Docker
Docker Commons
Docker Pipeline
Docker API
Docker-build-step
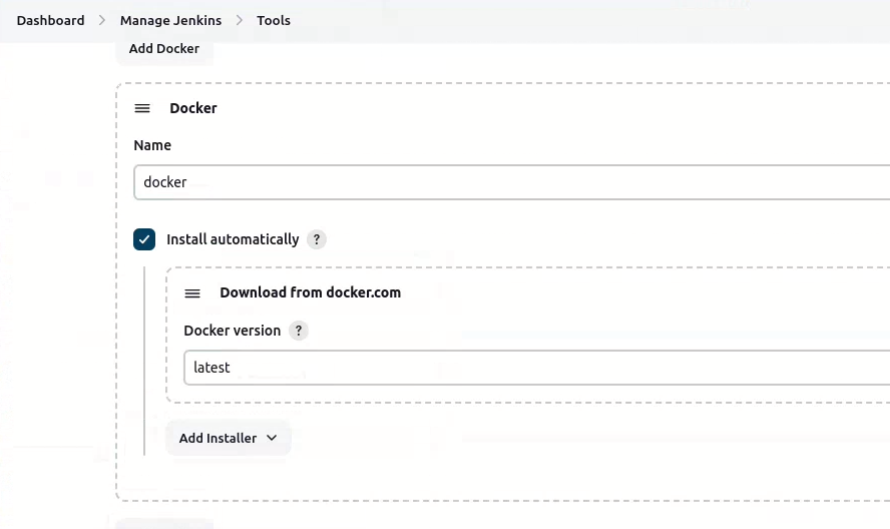
Now, goto Dashboard → Manage Jenkins → Tools →Docker installations
Name: docker
check install automatically
choose download from docker.com
version: latest
Add Docker Hub Username and Password under Global Credentials
Goto manage jenkins> Credentials > system> global credentials> create
kind : username with password
username : username of docker hub (Don't have then create first).
id: docker

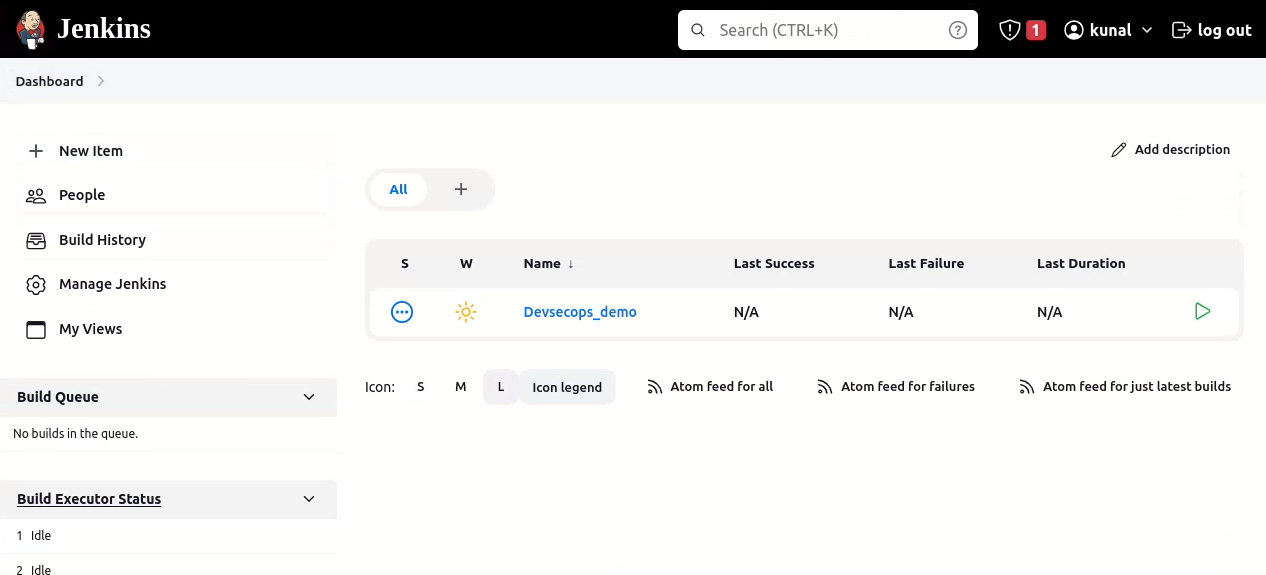
Step8: Create Job


Step9: Configure Sonar Server in Manage Jenkins
Grab the Public IP Address of your EC2 Instance, Sonarqube works on Port 9000, so http://<EC2 Public IP Address:9000>
Goto your Sonarqube Server.
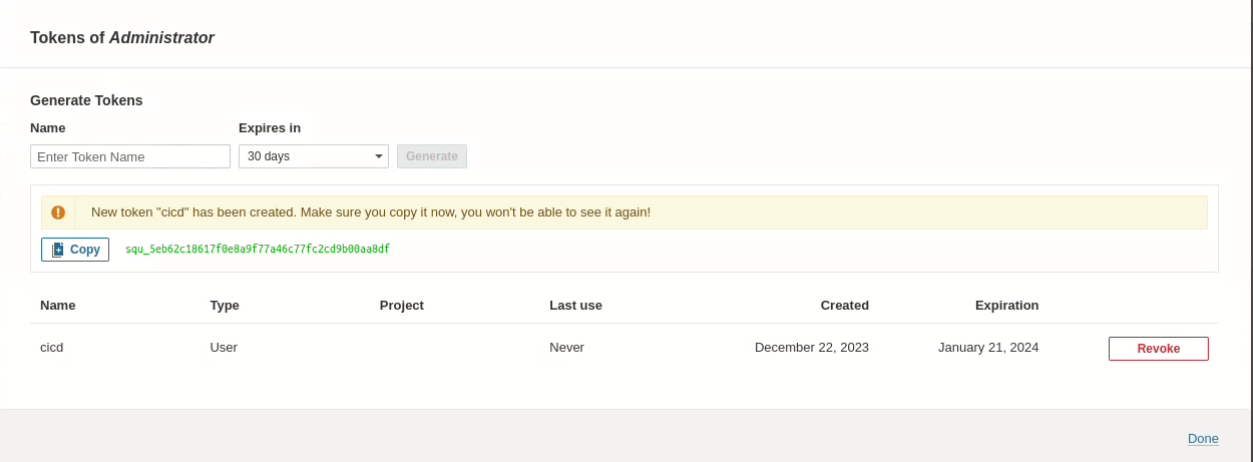
Click on Administration → Security → Users → Click on Tokens and Update Token → Give it a name → and click on Generate Token
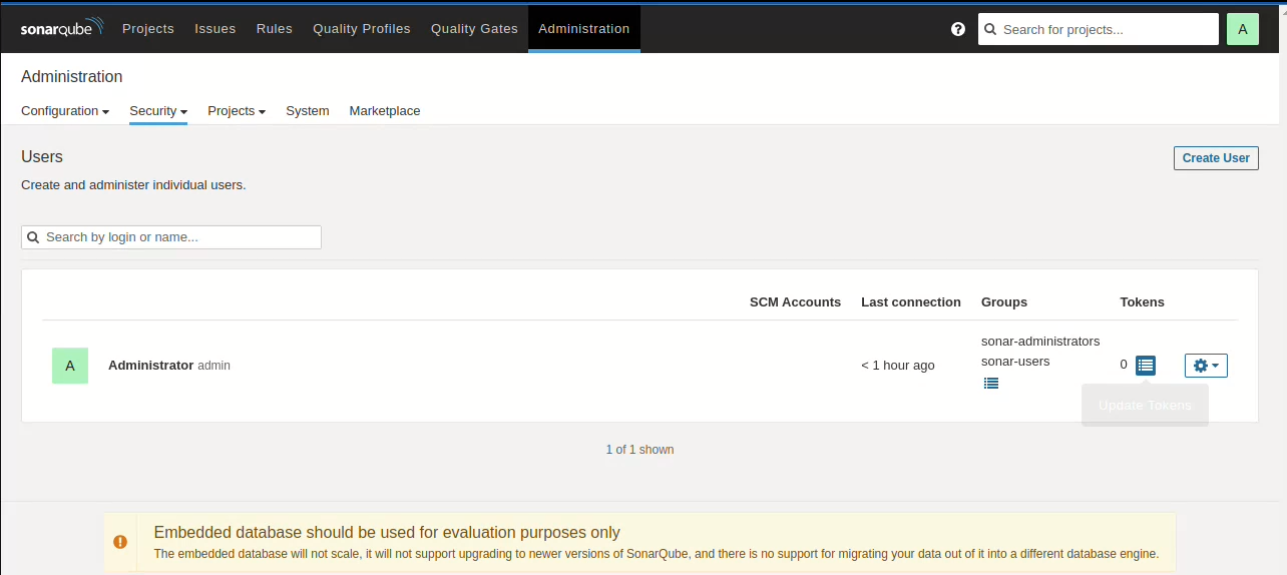

After click on generate, token will be generate and now copy it and save somewhere.
Goto Jenkins Dashboard → Manage Jenkins → Credentials.
Now, Click on system.
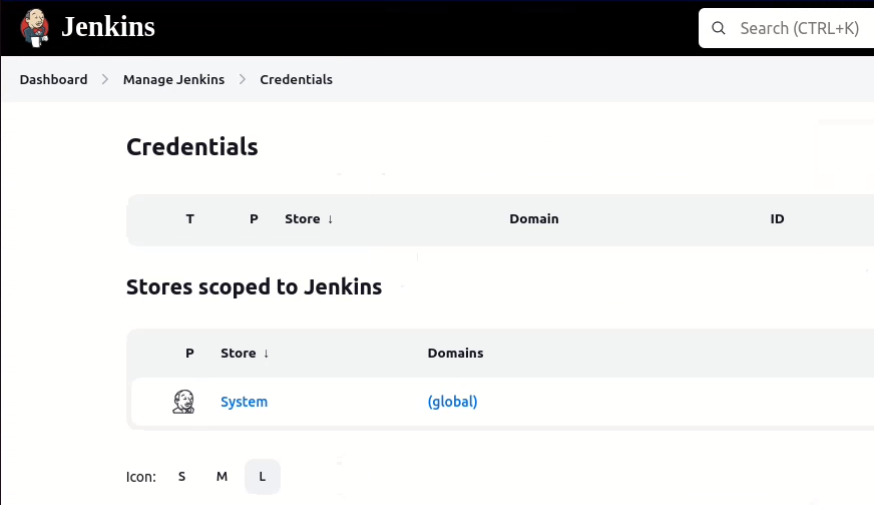
Now, click on Global credentials.

Now, Click add Credentials.

Kind: Secret text
Secret: Paste token from sonarqube
ID: Sonar-token
click on create.


Now, go to Dashboard → Manage Jenkins → System and Add like the below image.
Search sonarqube
name: sonar-server
server url: http://your public-ip:9000
server authentication token: Sonar-token
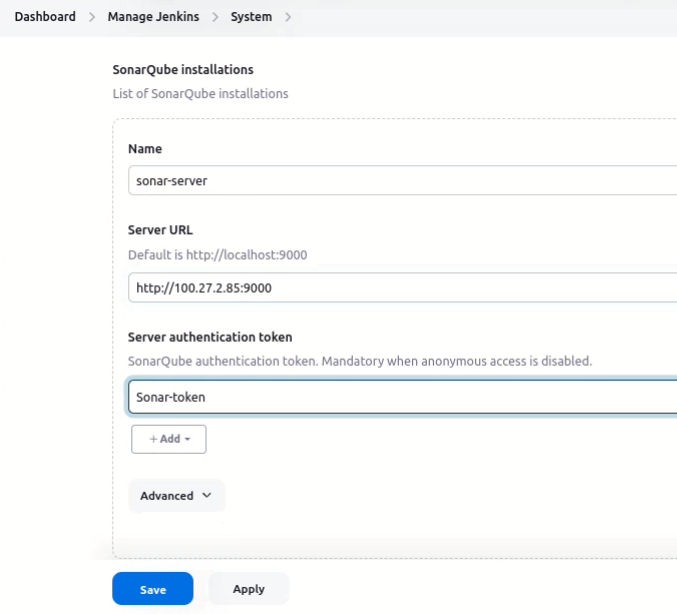
Click on Apply and Save
The Configure System option is used in Jenkins to configure different server
Global Tool Configuration is used to configure different tools that we install using Plugins
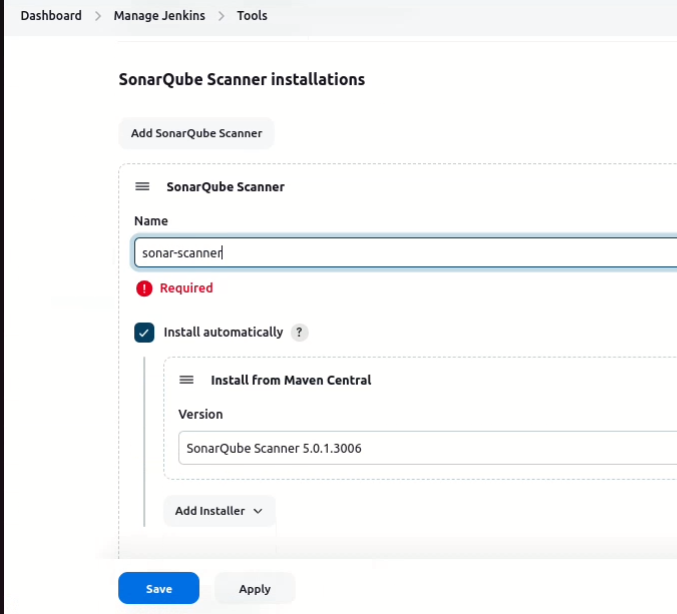
We will install a sonar scanner in the tools.
Go to manege Jenkins> Tools > SonarQube Scanner installations
- name: sonar-scanner
In the Sonarqube Dashboard add a quality gate also
Administration → Configuration →Webhooks

Click on create.
Name: Jenkins
Url: http://public_ip:8080/sonarqube-webhook/


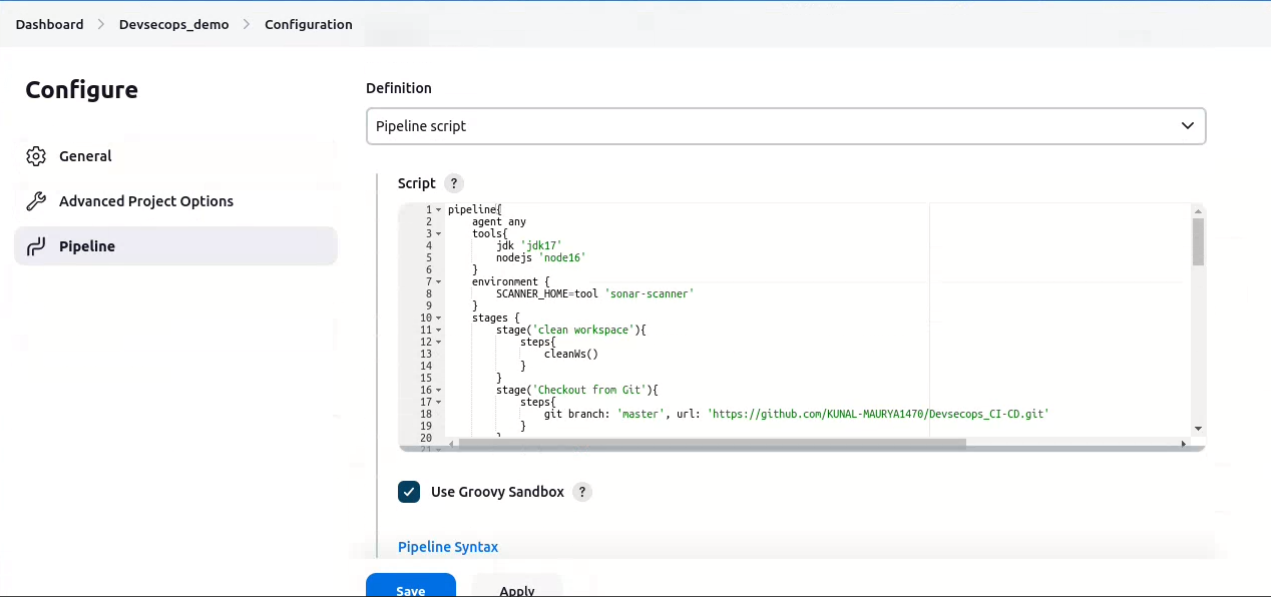
Step10: Create pipeline
Go to Dashboard > devsecops_demo> configuration > pipeline.
Paste following script in script section:
pipeline{
    agent any
    tools{
        jdk 'jdk17'
        nodejs 'node16'
    }
    environment {
        SCANNER_HOME=tool 'sonar-scanner'
    }
    stages {
        stage('clean workspace'){
            steps{
                cleanWs()
            }
        }
        stage('Checkout from Git'){
            steps{
                git branch: 'main', url: 'https://github.com/KUNAL-MAURYA1470/Devsecops_CI-CD.git'
            }
        }
        stage("Sonarqube Analysis "){
            steps{
                withSonarQubeEnv('sonar-server') {
                    sh ''' $SCANNER_HOME/bin/sonar-scanner -Dsonar.projectName=Game \
                    -Dsonar.projectKey=Game '''
                }
            }
        }
        stage("quality gate"){
           steps {
                script {
                    waitForQualityGate abortPipeline: false, credentialsId: 'Sonar-token'
                }
            }
        }
        stage('Install Dependencies') {
            steps {
                sh "npm install"
            }
        }
stage('OWASP FS SCAN') {
            steps {
                dependencyCheck additionalArguments: '--scan ./ --disableYarnAudit --disableNodeAudit', odcInstallation: 'DP-Check'
                dependencyCheckPublisher pattern: '**/dependency-check-report.xml'
            }
        }
        stage('TRIVY FS SCAN') {
            steps {
                sh "trivy fs . > trivyfs.txt"
            }
        }
stage("Docker Build & Push"){
            steps{
                script{
                   withDockerRegistry(credentialsId: 'docker', toolName: 'docker'){
                       sh "docker build -t devsecops_ad ."
                       sh "docker tag devsecops_ad kunalmaurya/devsecops_ad:latest "
                       sh "docker push kunalmaurya/devsecops_ad:latest "
                    }
                }
            }
        }
        stage("TRIVY"){
            steps{
                sh "trivy image kunalmaurya/devsecops_ad:latest > trivy.txt"
            }
        }
stage('Deploy to container'){
            steps{
                sh 'docker run -d --name 2048 -p 3000:3000 kunalmaurya/devsecops_ad:latest'
            }
        }
stage('Deploy to kubernets'){
            steps{
                script{
                    withKubeConfig(caCertificate: '', clusterName: '', contextName: '', credentialsId: 'k8s', namespace: '', restrictKubeConfigAccess: false, serverUrl: '') {
                       sh 'kubectl apply -f deployment.yaml'
                  }
                }
            }
        }

    }
}
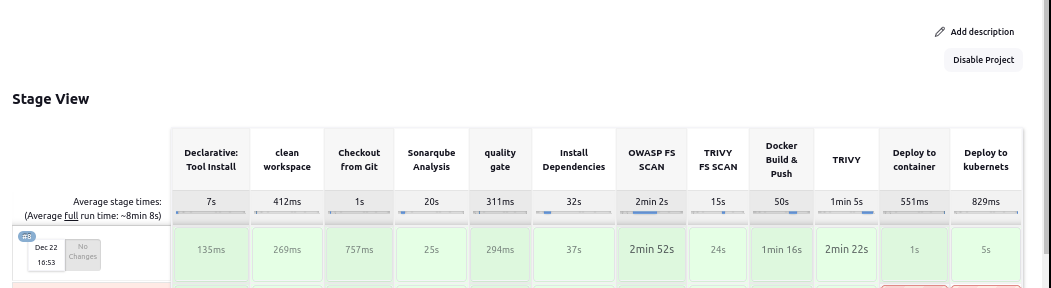
Now click on "build now":

You can see all the stages will complete except deploy on kubernetes:

Now, we can access reactjs app on port no "3000" of the instance.
http://public-ip:3000
Step11: Deploy on kubernetes
Take-Two Ubuntu 20.04 instances one for k8s master and the other one for worker. T2.MEDIUM 15 GB refer "step1".

Install Kubectl on Jenkins machine also.
sudo apt update
sudo apt install curl -y
curl -LO https://dl.k8s.io/release/$(curl -L -s https://dl.k8s.io/release/stable.txt)/bin/linux/amd64/kubectl
sudo install -o root -g root -m 0755 kubectl /usr/local/bin/kubectl
kubectl version --client
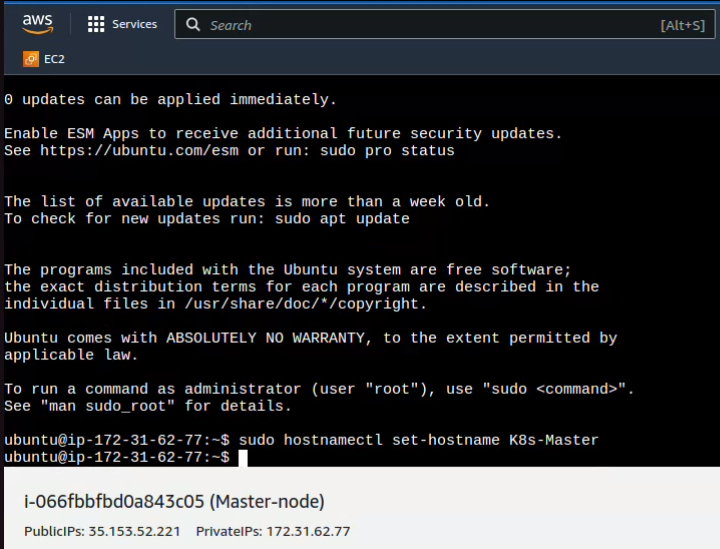
Set up hostname
Set the hostname for Master Server. connect master server refer connect ec2 step1.
sudo hostnamectl set-hostname K8s-Master
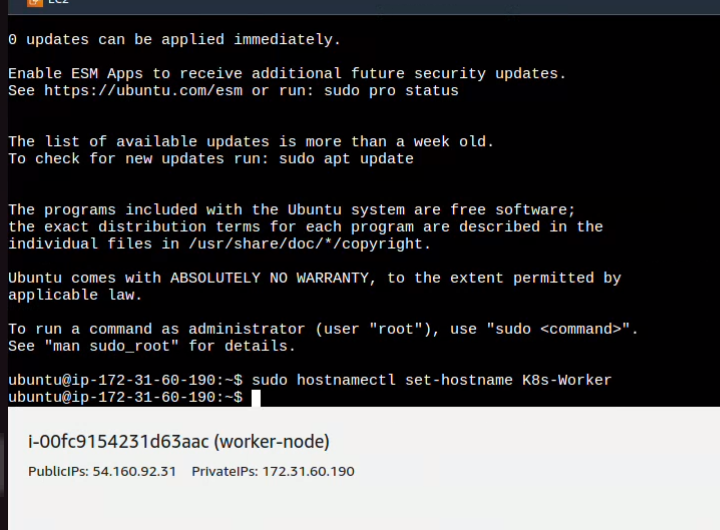
Set the hostname for worker Server. connect worker server refer connect ec2 step1.
sudo hostnamectl set-hostname K8s-Worker
Install Kubeadm/Kubelet/kubectl in both Both Master & Node
Being a root user in both Master and Worker Node.
sudo su
sudo apt-get update
sudo apt-get install -y docker.io
sudo usermod –aG docker $USER
newgrp docker
sudo chmod 777 /var/run/docker.sock
sudo curl -s https://packages.cloud.google.com/apt/doc/apt-key.gpg | sudo apt-key add -
sudo tee /etc/apt/sources.list.d/kubernetes.list <<EOF
deb https://apt.kubernetes.io/ kubernetes-xenial main
EOF
sudo apt-get update
sudo apt-get install -y kubelet kubeadm kubectl
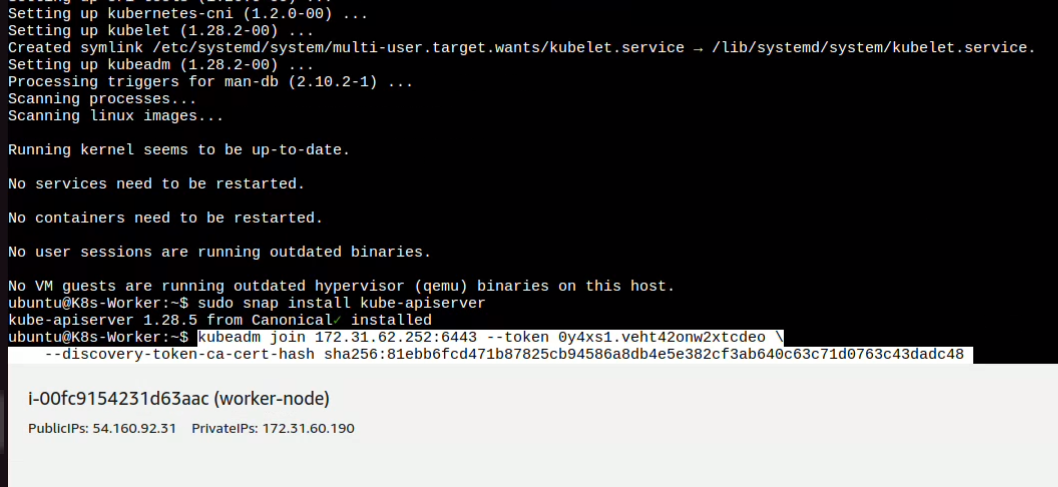
sudo snap install kube-apiserver
Copy the command mentioned below and paste it on the Master Node.
kubeadm init --pod-network-cidr=192.168.0.0/16After the execution, you'll get a token like this on the Master Node similar like this "kubeadm join 172.31.38.87:6443 --token oex63s.lsnckry4b4ieb3la --discovery-token-ca-cert-hash
sha256:f05654f8caf4fd49bbbd4d6b568461e292ad84631175898464a35b3c".

Run the command mentioned below on the Master Node.
  mkdir -p $HOME/.kube
  sudo cp -i /etc/kubernetes/admin.conf $HOME/.kube/config
  sudo chown $(id -u):$(id -g) $HOME/.kube/config
Copy and paste your code (not this) it on the Worker Node, then press "ENTER".
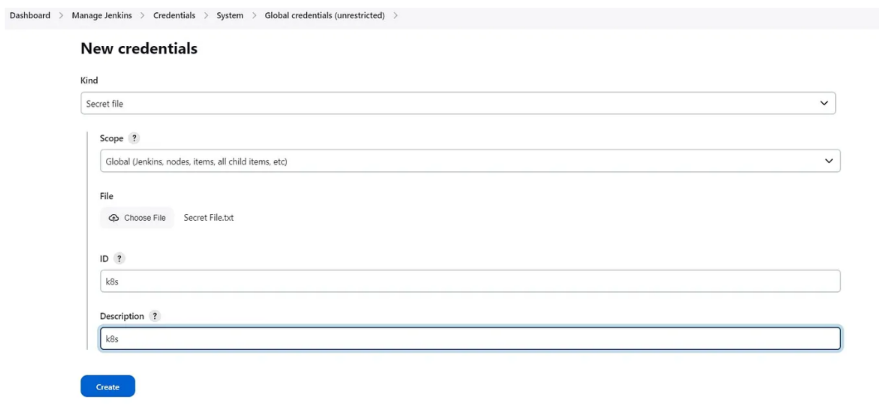
Copy the config file FROM K8 MASTER to the local laptop and save it with a name secret-file.txt and use this at the Kuberenetes credential section
secret-file can be found ./kube/config directory.
Install Kubernetes Plugins
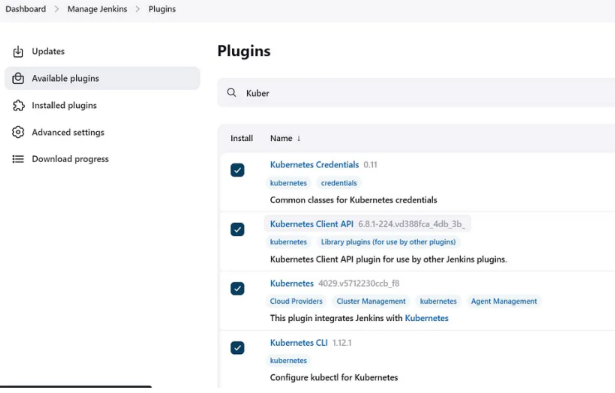
Go to manage Jenkins → manage credentials → Click on Jenkins global → add credentials.
RUN THE PIPELINE

kubectl get all

Wait till all the pods get ready status.
kubectl get svc
Access from a Web browser with
<public-ip-of-slave:3000>

Step 12: Terminate instances.
Please terminate all instances in your aws account.
Code use in this deployment.
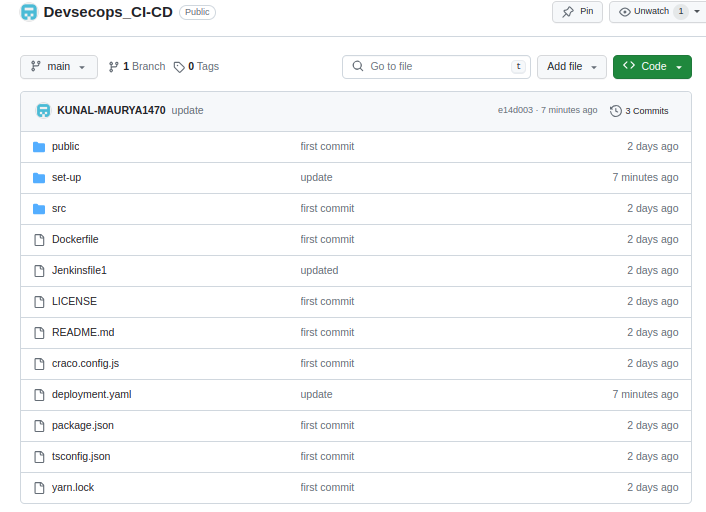
Github repository:
https://github.com/KUNAL-MAURYA1470/Devsecops_CI-CD.git
Dockerfile
    # Use Node.js 16 as the base image
    FROM node:16

    # Set the working directory in the container
    WORKDIR /app

    # Copy package.json and package-lock.json to the container
    COPY package*.json ./

    # Install project dependencies
    RUN npm install

    # Copy the rest of the application code to the container
    COPY . .

    # Build the React app
    RUN npm run build

    # Expose port 3000 for the React app
    EXPOSE 3000

    # Start the React app
    CMD ["npm", "start"]
Deployment.yaml
  apiVersion: apps/v1
  kind: Deployment
  metadata:
    name: react-app-deployment
  spec:
    replicas: 3  # Adjust the number of replicas as needed
    selector:
      matchLabels:
        app: react-app
    template:
      metadata:
        labels:
          app: react-app
      spec:
        containers:
          - name: react-app-container
            image: kunalmaurya/devsecops_ad:latest  # Use your actual Docker  image name and tag
            ports:
              - containerPort: 3000  # The port your React app is listening on

  ---
  apiVersion: v1
  kind: Service
  metadata:
    name: react-app-service
  spec:
    selector:
      app: react-app
    ports:
      - protocol: TCP
        port: 80  # The port exposed by the service within the cluster
        targetPort: 3000  # The port your React app is listening on inside the pod
    type: LoadBalancer
Thanks for reading.
