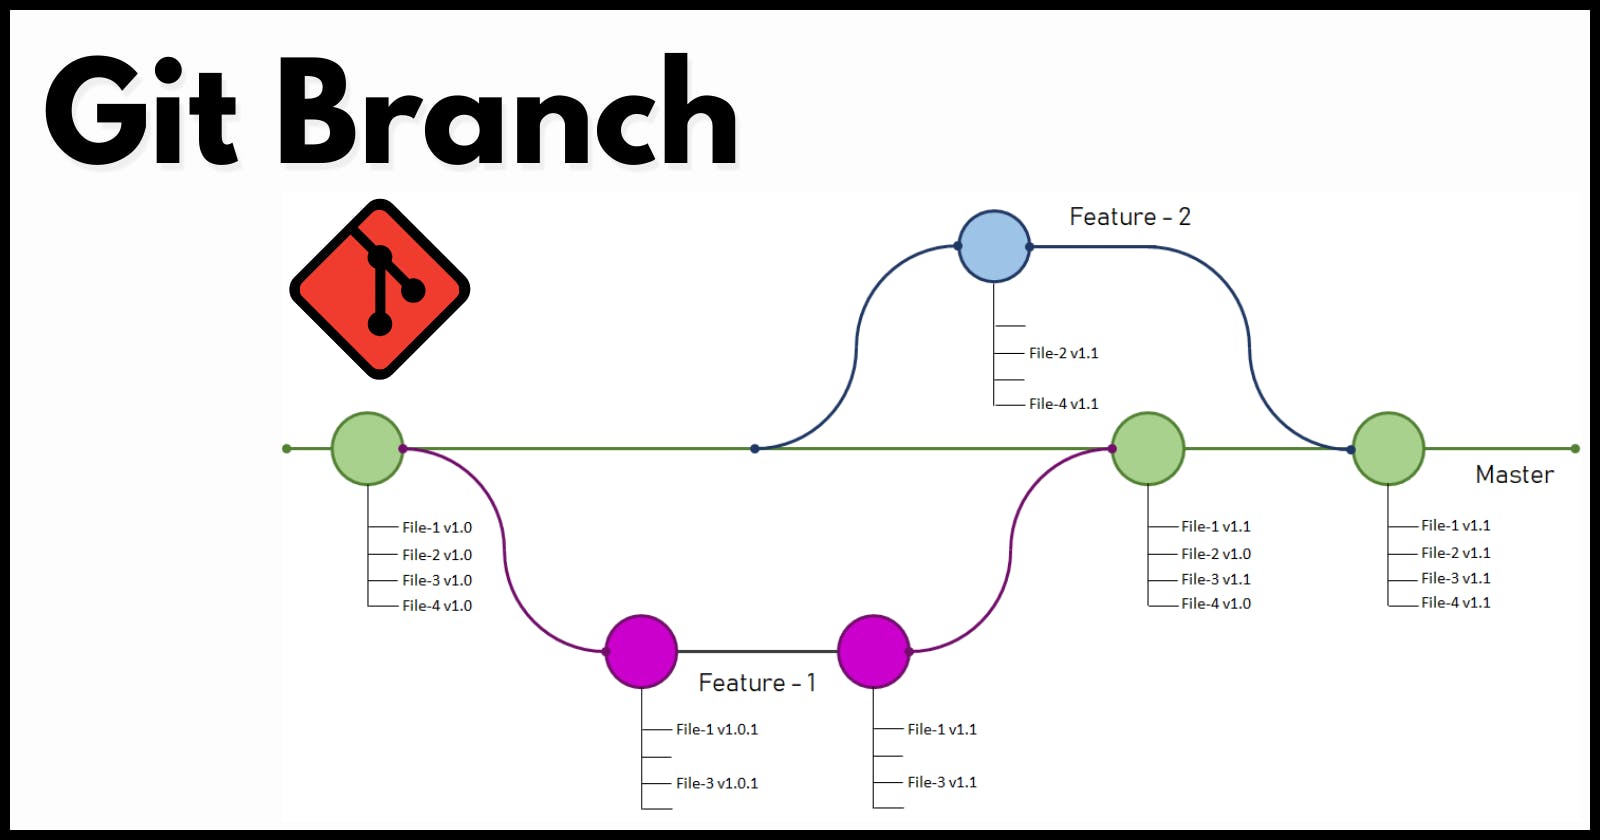


Git is a powerful version control system that allows developers to collaborate on projects efficiently. One of the key features of Git is the ability to create branches, which are essentially different versions of the codebase that can be worked on independently. In this blog, we'll explore Git branches in detail, including what they are, why they're useful, and how to create and manage them.
What is a Git Branch?
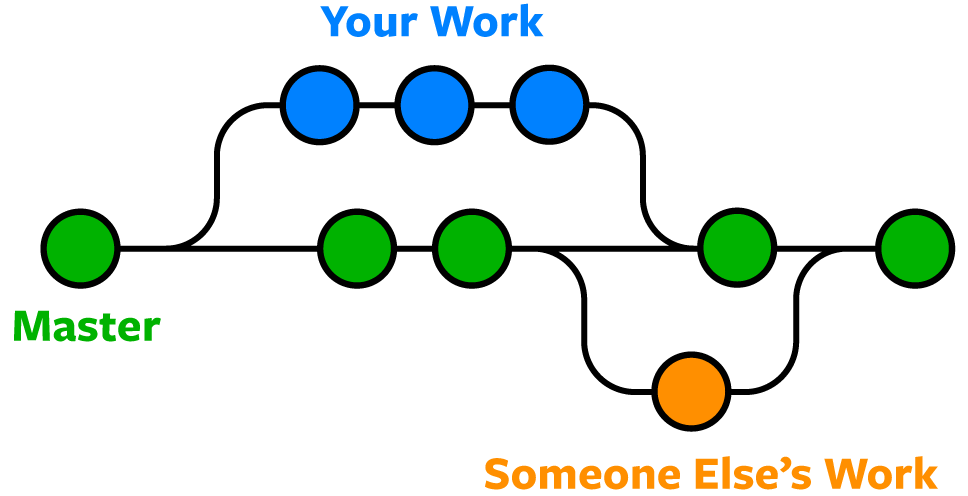
Basically, a branch is a separate version of your codebase that you can work on independently. This means that you can experiment with new features or changes without affecting the main codebase. And if your experiment fails, no worries! Just discard the changes and move on with your life.
But that's not all! Git branches also make it easy to collaborate with other developers. For example, if you're working on a feature while your colleague is fixing a bug, you can both work on separate branches without interfering with each other's work. And when you're ready to merge your changes back into the main codebase, Git makes it easy to do so.
Creating a New Branch
Creating a new branch in Git is easy. You simply use the following command:
git branch <branch-name>
This will create a new branch with the specified name. For example, if you want to create a branch named "feature-branch" :
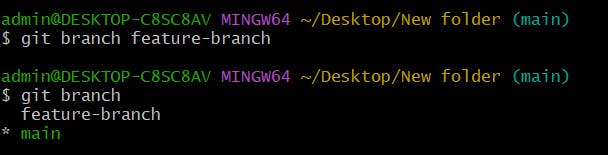
To list all of the branches in your Git repository, use the following command:
git branch
Once you've created the branch, you can switch to it using the following command:
git checkout <branch-name>
For example, to switch to the "feature-branch" that we just created, you would use the following command:

The "*" mark is showing the Current branch.
Also, To create a new branch and switch to it at the same time, use the following command:
git checkout -b <new-branch-name>
example:

Deleting a Branch
If you no longer need a branch, you can delete it using the following command:
git branch -d <branch-name>
For example, to delete the "feature-branch" that we just created, you would use the following command:

To delete a remote branch, run this command:
git push origin --delete my-branch-name
Renaming the Current Branch
To rename the current branch, you can use the following command:
git branch -m <new-branch-name>
For example, if you want to rename the current branch to "changed_name", you would use the following command:

If you are in a different branch and want to rename the branch locally mean, Pass the following command:
git branch -m <old_branch_name> <new_branch_name>
Push to a Branch
Pushing changes to a branch is the process of sending your local changes to the remote repository so that others can access them. Here's how you can push changes to a branch in Git.
First, make sure that you're on the branch that you want to push. You can use the "git branch" command to see which branch you're currently on.
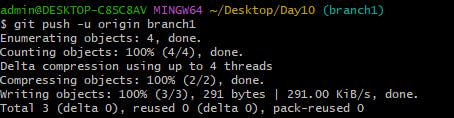
If your local branch does not exist on the remote, run either of these commands:
git push -u origin my-branch-name
         - OR -
git push -u origin HEAD
NOTE: HEAD is a reference to the top of the current branch, so it's an easy way to push to a branch of the same name on the remote. This saves you from having to type out the exact name of the branch!
If your local branch already exists on the remote, run this command:
git push
Pulling Changes to a Branch:
Pulling changes from a branch is the process of updating your local branch with changes that have been made on the remote repository.
First, make sure that you're on the branch that you want to pull changes into. You can use the "git branch" command to see which branch you're currently on.
Pull changes from the remote repository to your local branch using the following command:
git pull <remote> <remote-branch-name>
For example, if you want to pull changes from a branch named "new-feature-branch" on the "origin" remote repository, you would use the following command:
git pull origin new-feature-branch
This command will pull the changes from the "new-feature-branch" on the "origin" remote repository to your local branch.
Merge and Rebase
Both merging and rebasing are ways to combine changes from one branch into another branch, but they do it in different ways.

Merge
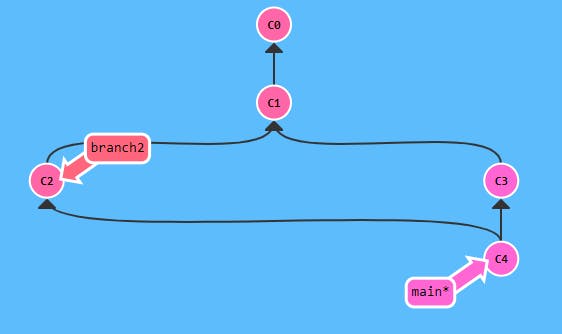
Merging in Git is the process of combining changes from one branch into another branch. This is useful when you want to incorporate changes made in a separate branch back into the main branch of your codebase. The process of merging creates a new commit that contains the changes from both branches.
Here's how to merge a branch into another branch in Git:
First, switch to the branch you want to merge changes into.
git checkout <branch-to-merge-into>
Merge the branch you want to merge changes from into the current branch.
git merge <branch-to-merge>
For example,
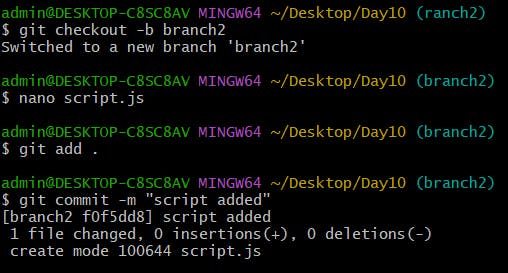
let us create a new branch called "branch2" and switch to it using following command:
git checkout -b branch2
Do some changes to it like we have added a new file "script.js" and then add and commit:
git add .
git commit -m "script added"

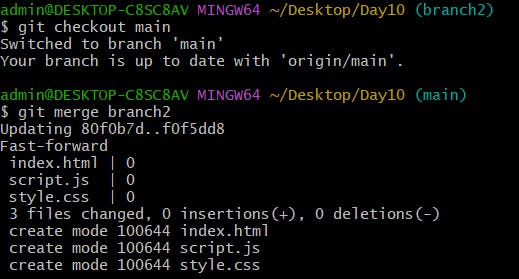
Now switch to the main branch and merge branch2.
git checkout main
git merge branch2
Rebase
Rebasing in Git is a way to apply changes from one branch onto another branch. It's often used to keep a clean and linear history, rather than having lots of messy merge commits.
First, switch to the branch you want to rebase.
git checkout <branch-to-rebase>
Rebase the current branch onto the branch you want to rebase onto.
git rebase <branch-to-rebase-onto>
For example:
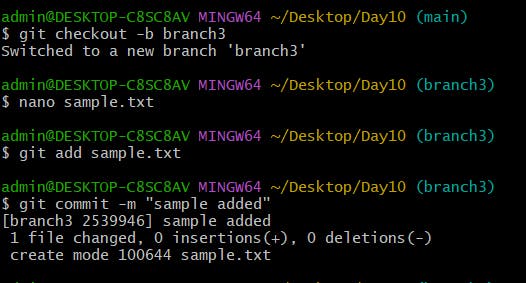
Let us create a new branch Using git checkout -b branch3 and added a new file called sample.txt and committed it. It will looks like this:
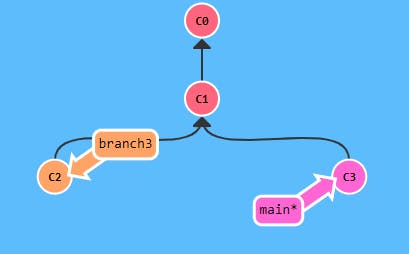
Now, switch to main branch using git checkout -b branch3 and rebase the branch3 using git rebase branch3 .

This will look like this:

Reflog
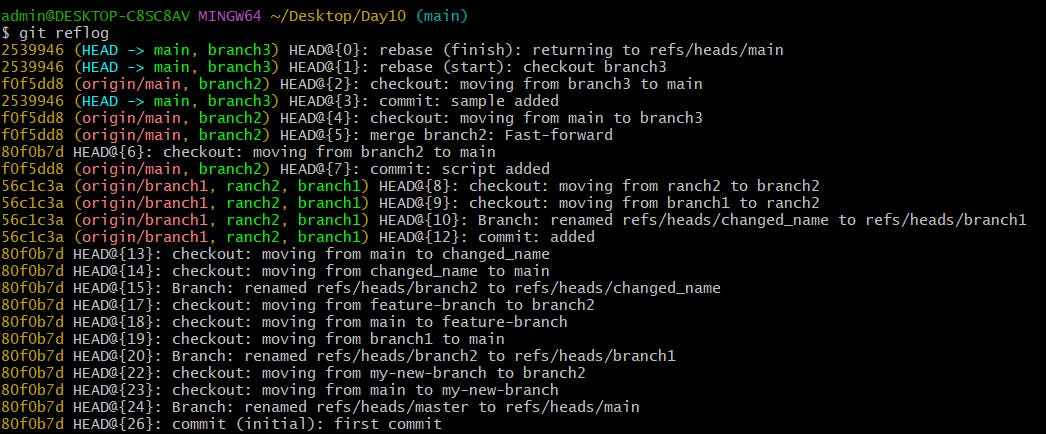
The git reflog command displays a log of all the changes to the Git repository, including commits, merges, and resets. This command is useful for recovering lost commits or branches.
git reflog
The above command will display a list of all the changes made to the repository, along with the hash of the commit and the action taken.
Reversing Changes in Git
There are two primary ways to undo changes in Git -- one is by using git reset and the other is using git revert.
Reset
The git reset command is used to undo changes by moving the current branch pointer to a different commit. This is useful when you want to "rewind" your repository to a specific commit and discard any changes made after that point.
Example:
Let's say you have made some changes and committed them, but you now realize that you want to discard those changes and go back to the last commit. You can reset your repository with the following command:
git reset --hard HEAD^
This will move your current branch pointer to the previous commit (i.e., HEAD^). The --hard flag tells Git to discard any changes made after that point. If you want to keep the changes in your working directory, you can use the --soft flag instead.
git reset --soft HEAD^
This will move your branch pointer to the previous commit, but leave the changes in your working directory.
Revert
Revert: The
git revertcommand creates a new commit that undoes the changes made by a specific commit. This is useful when you want to undo a change but still keep a record of it in your commit history.Example:
Let's say you have a commit with the hash
abc123that introduced a bug. You can revert that commit with the following command:git revert abc123Git will create a new commit that undoes the changes made by
abc123. You can view the changes in the commit message.output:
 Revert "Commit message from abc123"

 This reverts commit abc123.
The reverted changes will now be in your working directory, and you can commit them as a new change.
Thank you for reading! Hope you find this article helpful.
~Kunal